Material Master Tables In Sap
Dear All,
There is a complete listof SAP MM basic tables
Maintenance of planning strategy group in material master - the planning- strategy gp (MRP2 view) for material master is currently left blank for all semi-finished (37. level) items - as such, both requirements are taken into account - SAP personnel has advised that maintaining the strategy group 52 would sol=. LFM2, Vendor Master: Purchasing Data (Plant, Vendor sub-range). MARA, Material Master: General data. MAKT, Material Master:.
Material Master Data:
MARA – General Data, material type
MAKT– Short Texts, descriptions
MARM– Conversion Factors
Total war: attila best overhaul mods. MVKE – Sales Org, distribution channel
MLAN – Sales data, tax indicator, tax
MARC – classification
MBEW – Plant Planning Data
MLGN – Valuation Data
MLGT – Warehouse Management Inventory Data
MVER – Warehouse Management Storage Type
MAPR – Data
MARD – Consumption Data
MCHA – Pointer for Forecast Data
MCHB – Storage location data
Purchasing:
EKPO– Purchasing Document Item
EKKO– Purchasing Document Header
EBAN– Purchase Requisition
EKBE– History per Purchasing Document
EKET– Scheduling Agreement Schedule Lines
EINE– Purchasing Info Record: Purchasing Organization Data
EKKN– Account Assignment in Purchasing Document
EINA– Purchasing Info Record: General Data
EKES– Vendor Confirmations
EBKN– Purchase Requisition Account Assignment
EORD– Purchasing Source List
T024– Purchasing Groups
EKBZ– History per Purchasing Document: Delivery Costs
AMPL– Table of Approved Manufacturer Parts
EKAN– Vendor Address: Purchasing Document
Inventory Management:
MSEG– Document Segment: Material
MKPF– Header: Material Document
RESB– Reservation/dependent requirements
MARI– Short document: material movement
ISEG– Physical Inventory Document Items
RKPF– Document Header: Reservation
T156– Movement Type
IKPF– Header: Physical Inventory Document
T156T– Movement Type Text
CHVW– Table CHVW for Batch Where-Used List
T156SY– Mvt Type: Qty/Value Update: System Table; Rel. 4.6A
MMIM_REP_PRINT– Print Settings, Reporting MM-IM
T156S– Movement Type: Quantities/Value Posting (Until Rel. 4.5B)
T156W– Posting string values
T156M– Posting String: Quantity
Invoice Control:
RSEG– Document Item: Incoming Invoice
RBKP– Document Header: Invoice Receipt
BSIM– Secondary Index, Documents for Material
RKWA– Consignment Withdrawals
RBCO– Document Item, Incoming Invoice, Account Assignment
RBKP_BLOCKED– Logistics Invoice Verification: Blocked Invoices
RBKP_V– Generierte Tabelle zu einem View
Unifying software for mac. Logitech Unifying Software Vs 5.1 appeared in my MacUpdate list today. After installing it on a 2017 Retina iMac running High Sierra, I got the msg that the app was not compatible with my iMac system.However, It appears that I can configure a Logitech device via via SteerMouse payware with separate profiles for a Logitech G5 laser gaming mouse. And an ergonomic mouse from JTech.
V_169P_MB– Generierte Tabelle zu einem View
T149D– Global Valuation Types
RBDRSEG– Batch IV: Invoice Document Items
RBTX– Taxes: Incoming Invoice
RBWS– Withholding Tax Data, Incoming Invoice
RBKPB– Invoice Document Header (Batch Invoice Verification)
RBDIFFKO– Invoice Verification – Conditions
RBEX– Persistent Key Figures Header and Item
- SAP MM Tutorial
- SAP MM Useful Resources
- Selected Reading
SAP R/3 works on real-time data, i.e., there is no time lag between data entry and data availability. The important thing while creating any data is to maintain data integrity. SAP R/3 data is categorized into two −
Master data − Data that is created centrally, and is valid for all applications. It remains constant over time but we need to update it on a regular basis. For example: Vendor is a type of master data that is used for creating purchase orders or contracts.
Transactional data − Data that is associated with processing of business transaction is transactional data.
SAP Master Data is of the following two types −
Material Master Data
Vendor Master Data
Material Master Data
The key points to note about material master data are as follows −
This is the enterprise main source of material-specific data. This data will include information on the materials that a company can procure, produce, store, or sell.
Since there are different departments in an enterprise and each department works on some specific material, they will enter different information regarding their material. So, each user department has its own view of the material master record. The data screens that are used to create material master can be divided into two categories −
Main Data − This will include basic data (base unit of measure, weight), purchasing data (over tolerance and under tolerance), accounting data (standard price, moving price).
Additional Data − This will include additional information like short description about material, currency etc.
Material master has four characteristics, which we will discuss one by one in the following sections.
Material Types
Materials with some common attributes are grouped together and they are assigned to a material type. It differentiates the materials and allows organizations to manage different materials in a systematic manner in accordance to a company’s requirement. For example, raw material and finished products are some of the material types. Material type can be created by following the steps given below.
Path to create material type
IMG ⇒ Logistics General ⇒ Material Master ⇒ Basic Settings ⇒ Material Types ⇒ Define Attributes of Material Types
TCode: OMS2
Step 1 − On the Display IMG screen, select Define Attributes of Material Types, by following the above path.
Step 2 − Click the New Entries button.
Step 3 − Fill in the required information such as name of material type and description. Click on Save. A new material type will be created.
Material Groups
Material group is a wider range of material type. Materials with some common attributes are taken together and they are assigned to a material group. For example: We have some materials that are to be packaged, so the material type can be electrical or food products, but we can group these material types and put them in the packaged material group. Follow the steps given below to create a Material Group.
Path to Create Material Group
IMG ⇒ Logistic General ⇒ Material Master ⇒ Settings for Key Fields ⇒ Define Material Groups
TCode: OMSF
Step 1 − On the Display IMG screen, select Define Material Groups, by following the above path.
Step 2 − Click the New Entries button.
Step 3 − Enter the name of the material group along with its description. Click the Save button. A new material group will be created.
Number Range
When we create a material master record, every material is recognized by a unique number that is known as the material number. We can assign a number to a material through two ways −
External number assignment − While creating a material, you have to enter your own number (containing alphabets or digits), and that should be unique.
Internal number assignment − While creating a material, you need not enter any number. The system automatically generates a unique number to that material.
Define Number Range −
Internal number range can be defined by following the steps given below −
Path to Create Number Range
IMG ⇒ Logistic General ⇒ Material Master ⇒ Basic Settings ⇒ Material Types ⇒ Define Number Range for Each material Type
TCode: MMNR
Step 1 − On the Display IMG screen, select Define Number Range for Each Material Type, by following the above path.
Step 2 − Click the Intervals button.
Step 3 − We can define a number range here and EXT (external tab, if it is checked, then an external number can be assigned in that material). Click the Save button. Number Range is now defined for the material.
Assignment of Number Range
After defining, we need to assign it to a material group. Follow the steps given below to assign a number range.
Step 1 − On the same screen, select the Groups tab.
Step 2 − For a particular material group, we can assign a number range here. Click on Save. The number range is now assigned to the material group.
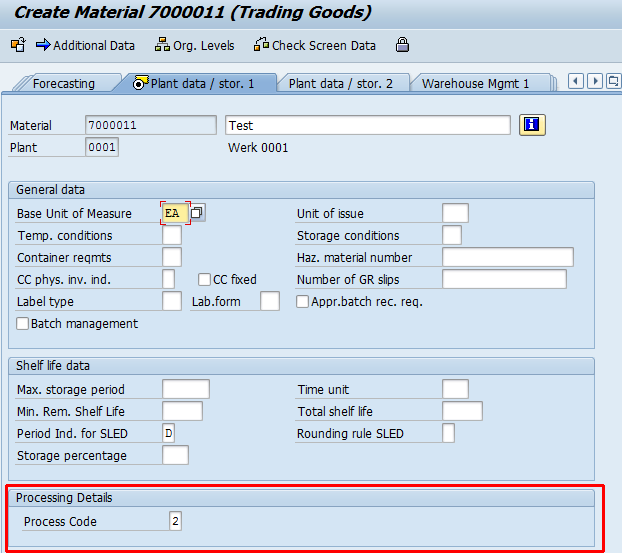
Material Master Creation
Material master contains information on all materials that a company procures, produces, or sells. It contains central data that is available at all the levels. Follow the steps given below to create a material master −
Path to Create Material Master
Logistics ⇒ Materials Management ⇒ Material Master ⇒ Material ⇒ Create Material
TCode: MM01
Note − For any create transaction, we use 01, for edit 02, for display 03 as suffix.
Step 1 − On the SAP Menu screen, click the create button by following the above path.
Step 2 − Fill in all the required details such as material number (if external number assignment), material type, industry sector, etc.
Step 3 − Select the views you want to maintain for your material.
Step 4 − Enter the name of the plant and the storage location.
Step 5 − Enter the required information in your material views such as unit of measure, currency, standard price, moving price, etc. Click on Save. A new material will be created.
Vendor Master Data
The key points about vendor master are as follows −
Vendor Master Data is the enterprise main source of vendor-specific data. It includes information on vendors from which a company can procure, or can sell.
A vendor master record contains information such as vendor's name, address, etc.
Data in a vendor master record is divided into three categories −
General Data − General data is maintained at client level and it is valid for all organizational levels.
Accounting Data − Accounting data is maintained at company level and it is valid for all plants belonging to that company.
Purchasing Data − Purchasing data is maintained at purchasing organization level.
Vendor master has three characteristics, which we will discuss one by one in the following sections.
Vendor Account Group
Vendors are categorized according to their requirements. Some of the vendors having similar characteristics are grouped together and placed in one category. For example, all local vendors can be placed under one account group. Create a Vendor Account group by following the steps given below.
Path to create Vendor Account Group
IMG ⇒ Logistic General ⇒ Business Partner ⇒ Vendors ⇒ Control ⇒ Define Account group and field selection(vendor)
TCode: OBD3
Step 1 − On the Display IMG screen, select Define Account Groups and Field Selection (Vendor), by following the above path.
Step 2 − Click the New Entries button.
Step 3 − Fill in all necessary details such as name of account group, general data, and field status. Click the Save button. A new Vendor Account Group will be created.
Number Range
When we create a vendor master record, every vendor is recognized by a unique number known as the vendor number. As in the case of material master, we have external as well as internal number assignments for vendor master.
Define Number Range:
Number range can be defined by following the steps given below −
Path to create Number Range
IMG ⇒ Logistic General ⇒ Business Partner ⇒ Vendors ⇒ Control ⇒ Define Number Range for Vendor master record
TCode: XDN1
Step 1 − On the Display IMG screen, select Define Number Range for Vendor Master Record, by following the above path.
Step 2 − Click the Intervals button. It will create a number range for the customer account.
Step 3 − Click the Insert button.
Step 4 − We can define a number range here and EXT (external tab, if it is checked, then external number assignment can be done in that vendor). Click on Save. A new Number Range will be created.
Assignment of Number Range
After defining a number range, we need to assign it to a vendor group. Follow the steps given below to assign the number range.
Step 1 − On the same screen as shown above, select the Number Range tab.
Step 2 − For a particular vendor group, assign a number range here. Click on Save. Number range is now assigned to the vendor group.
Creation of Vendor Master
Vendor Master contains a list of vendors from where a company can procure or sell goods. A Vendor Master can be created by following the steps given below −
Path to create Vendor Master
SAP Menu ⇒ Logistics ⇒ Material Management ⇒ Purchasing ⇒ Master Data ⇒ Vendor ⇒ Central ⇒ Create
TCode: XK01
Step 1 − On the SAP Menu screen, select Create for Central Vendor Data, by following the above path.
Step 2 − Fill in all the required details such as company code, purchasing org, and vendor number (if external number assignment).
Step 3 − Fill in all the details of vendor’s address such as street name, postal code, country.
Step 4 − Fill in the necessary bank details of the vendor.
Step 5 − Fill in the necessary accounting information of the vendor.
Step 6 − Fill in the terms of payment that are defined between the company and the vendor. Click on Save. A new vendor master will be created.